
Jenkins with asp.net core CI&CD pipeline for Linux
30 Dec 2020 | Jenkins DevOpsIn this tutorial, I will guild you to set up a CI and CD workflow pipeline step by step. I use this GitHub repository https://github.com/voltwu/Jenkins-.NET-Core-CI-CD-pipeline to demonstrate this example, which has two branches, main and dev.
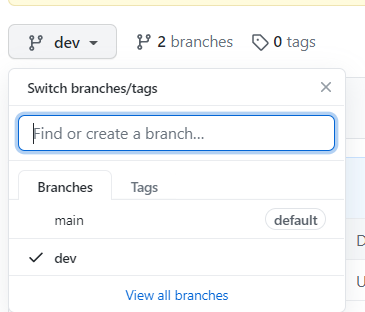 Example repository
The purpose of this article:
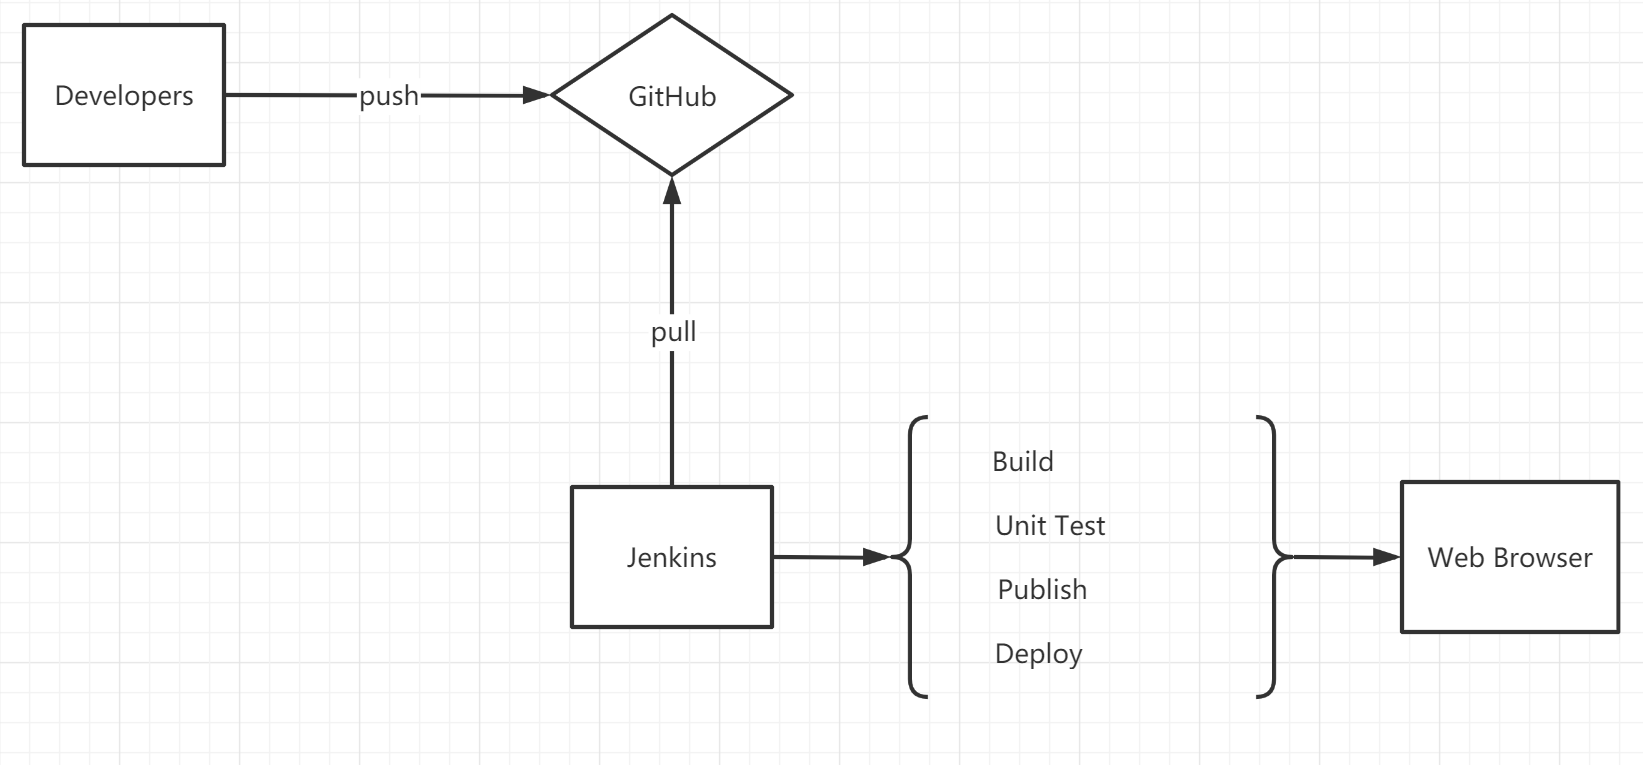 Jenkins pipeline architecture
Developers push their codes into a repository(Such as Github), Jenkins will automatically pull codes from that repository, then process build, test, publish and deploy. All of these will be processed automatically in the Jenkins pipeline.
Prerequisites
- A Linux machine. I am using Debian 9.
- .Net Core 3.1 installed. Check Net Core Install on Linux for the installation guild.
- A running Jenkins. Check Jenkins Installation, if you haven’t installed Jenkins yet.
Create A Job
Click New Item
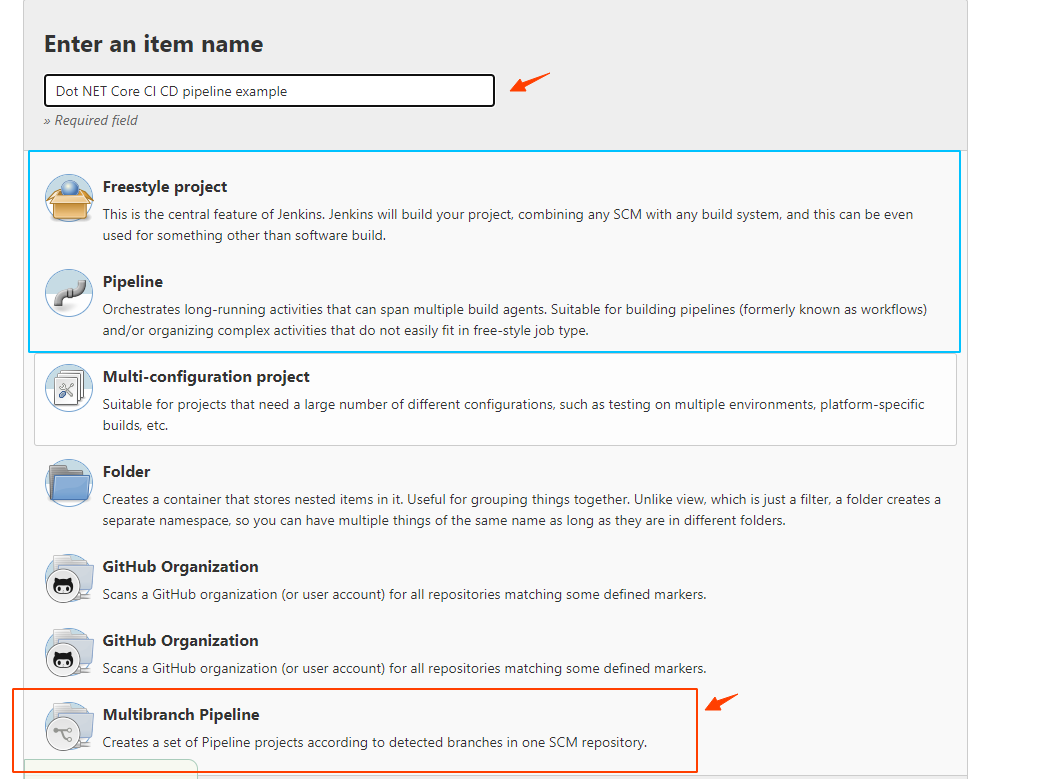 Create A New Job
Fill item name and click Multibranch Pipeline. The other two types Freestyle project and Pipeline are also commonly used in Jenkins. In contrast to the Multibranch Pipeline, the other two are function limited and feature lesser. The following is a brief comparison of three of them.
- Freestyle Project: Build or run simple jobs like allowing to specify the version control system from which you need to extract code and build it and call tests if available.
- Pipeline: Setup continuous delivery pipeline or say define the deployment pipeline as code, which allows you to orchestrate all the stages in delivering an application as one single pipeline project.
- Multibranch Pipeline: This is similar to Pipeline. Multibranch Pipeline not just contains all functionalities that Pipeline supported, more further, Multibranch Pipeline allows you to pick a specific branch. If you have two branches
devandmain,devfor development,mainfor production, then you need to distinguish branches, so you can set up different pipelines.
Branch Sources
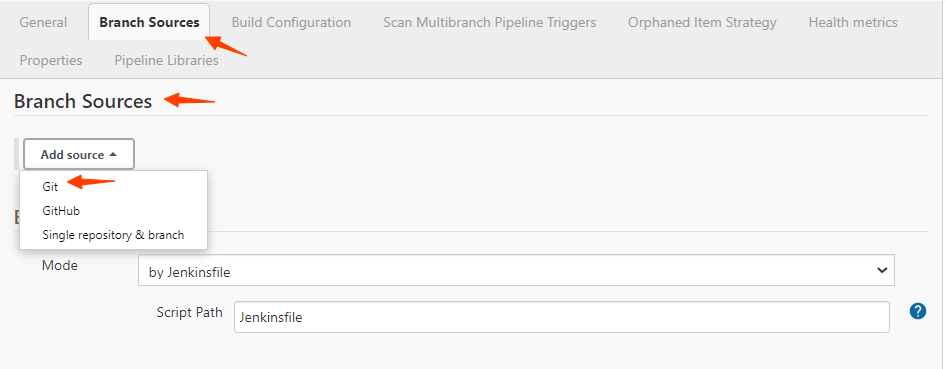 Branch Sources
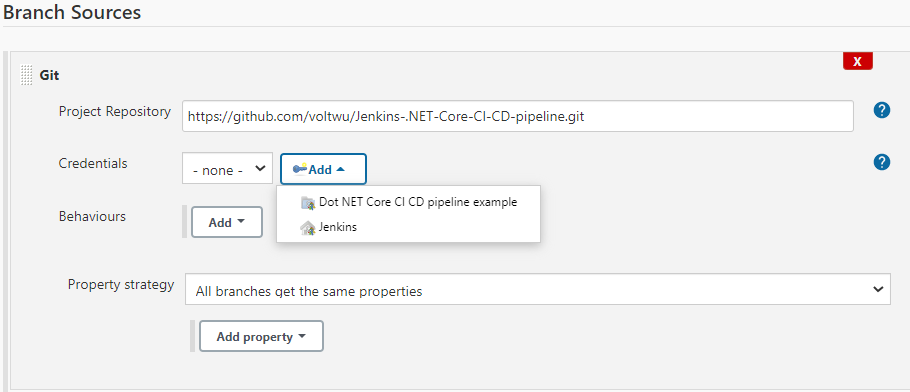
I use Git as the branch source example. Then fill in the project repository address, if the project is private, then you need to add credentials. This repository for this example is open, so I don’t need to add any credentials.
 Git Repository
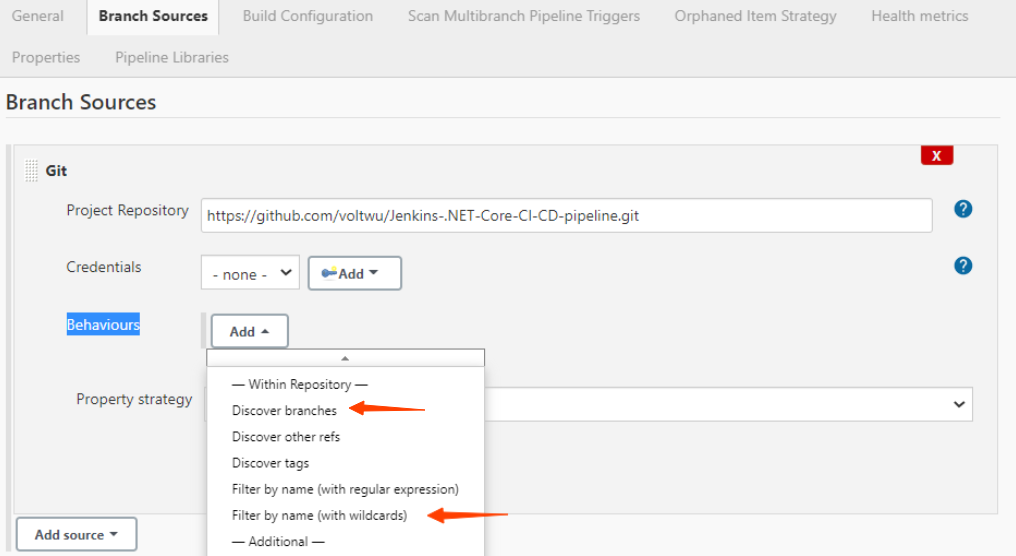
The Behaviours describes how to identify what branches you want to use. Here I choose to discover all branches and then filter branch name using wildcards.
 Filter name by wildcards
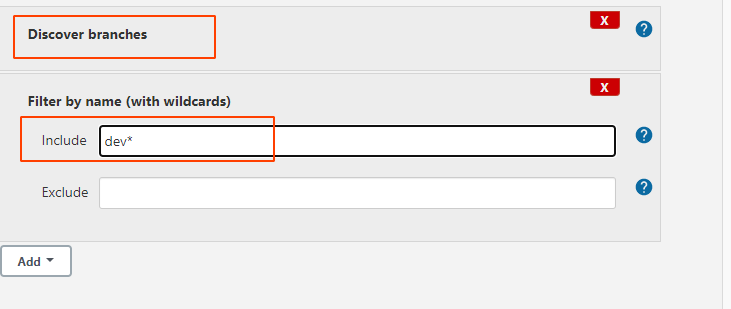 pick up all branches that starts with dev
I filled in Include with dev*, which will pick up all branches that name start with dev.
Build Configuration
 Build Configuration with jenkinsfile
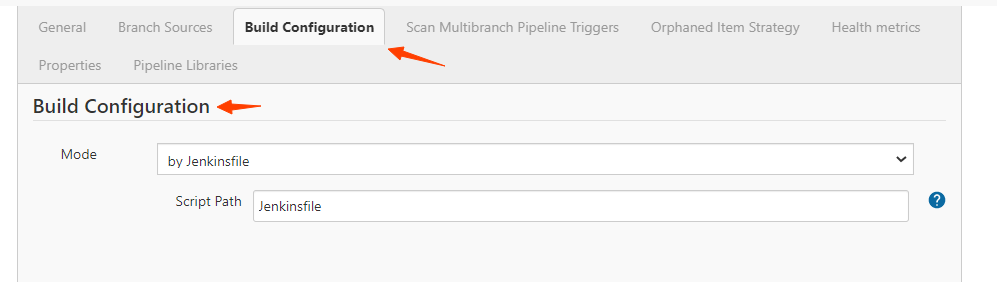
Choose Build Configuration Mode as by Jenkinsfile. Script Path specify the Jenkinsfile location, which will be located at the project’s root path by default. If your Jenkinsfile located at another place, you can specify it at Script Path.
Scan Multibranch Pipeline Triggers
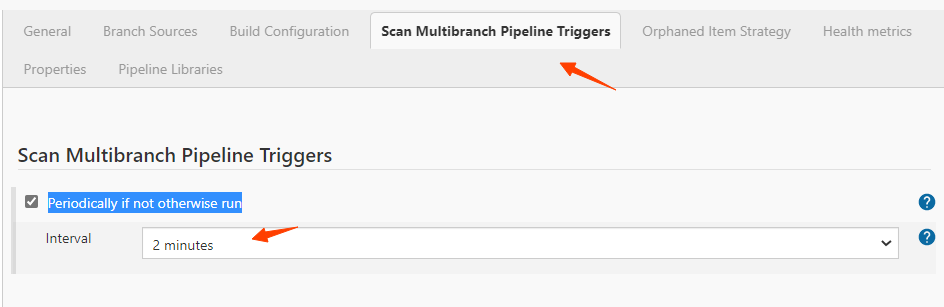 Periodically if not otherwise run
Sometimes, the Jenkins may unexpectedly unresponsive to your code’s push action. You should specify a periodical running task with an interval time, just in case of your Jenkins unresponsive.
Create a Jenkinsfile
The following is my Jenkins file, which includes six stages. And in the later, when everything set up completely. You can visualize these stages in the UI component.
I won’t discuss the pipeline syntax, as it already out of the scope of this article. Check this Pipeline Handlebook for scripted pipeline syntax and pipeline declarative syntax.
pipeline {
    agent any
    triggers {
        githubPush()
    }
    stages {
        stage('Restore packages'){
           steps{
               sh 'dotnet restore WebApplication.sln'
            }
         }
        stage('Clean'){
           steps{
               sh 'dotnet clean WebApplication.sln --configuration Release'
            }
         }
        stage('Build'){
           steps{
               sh 'dotnet build WebApplication.sln --configuration Release --no-restore'
            }
         }
        stage('Test: Unit Test'){
           steps {
                sh 'dotnet test XUnitTestProject/XUnitTestProject.csproj --configuration Release --no-restore'
             }
          }
        stage('Publish'){
             steps{
               sh 'dotnet publish WebApplication/WebApplication.csproj --configuration Release --no-restore'
             }
        }
        stage('Deploy'){
             steps{
               sh '''for pid in $(lsof -t -i:9090); do
                       kill -9 $pid
               done'''
               sh 'cd WebApplication/bin/Release/netcoreapp3.1/publish/'
               sh 'nohup dotnet WebApplication.dll --urls="http://104.128.91.189:9090" --ip="104.128.91.189" --port=9090 --no-restore > /dev/null 2>&1 &'
             }
        }
    }
}
As you can see from the above pipeline file., I set 6 stages, each stage corresponding different task.
Setup automatic build on push
In this section, I will set up an automatic build on push. Each push to the source code will trigger your Jenkins to run all of these stages as I described above.
In order to complete that, we need to set on both Jenkins and Github, so they can communicate with others. Set webhook on Github. (Your Jenkins needs to run on a public server, So Github can notify your Jenkins server.)
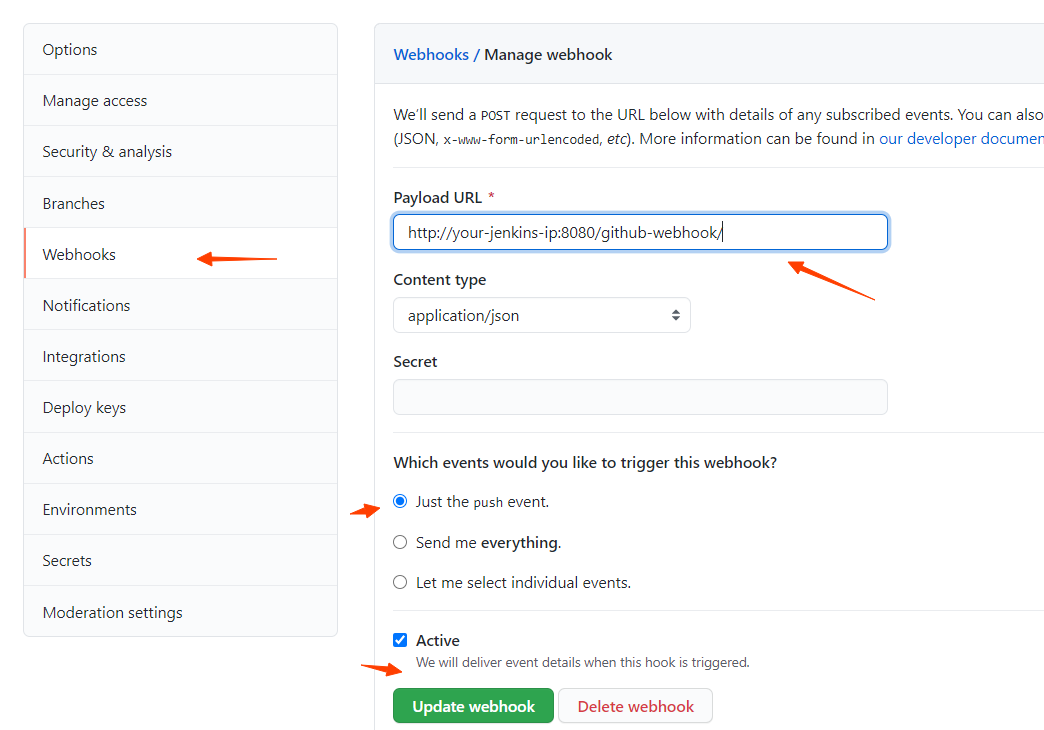 Github weebhook
Fill in your webhook address as http://server:port/github-webhook/.
In order to notify the Jenkins, you also need to add Following section at your Jenkinsfile:
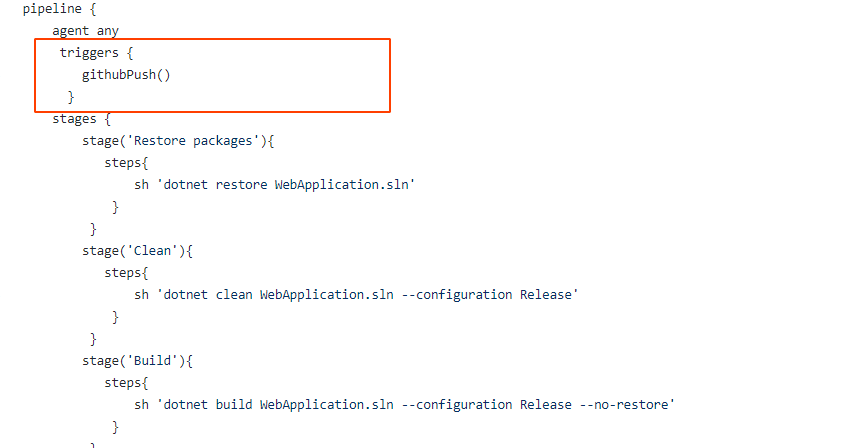 Jenkins notify as pipeline code
Take a look at How to trigger a Jenkins multibranch pipeline when code change is pushed to GitHub for more details.
Now, Github will notify your Jenkins server, when new pushes happened in your Jenkins server.
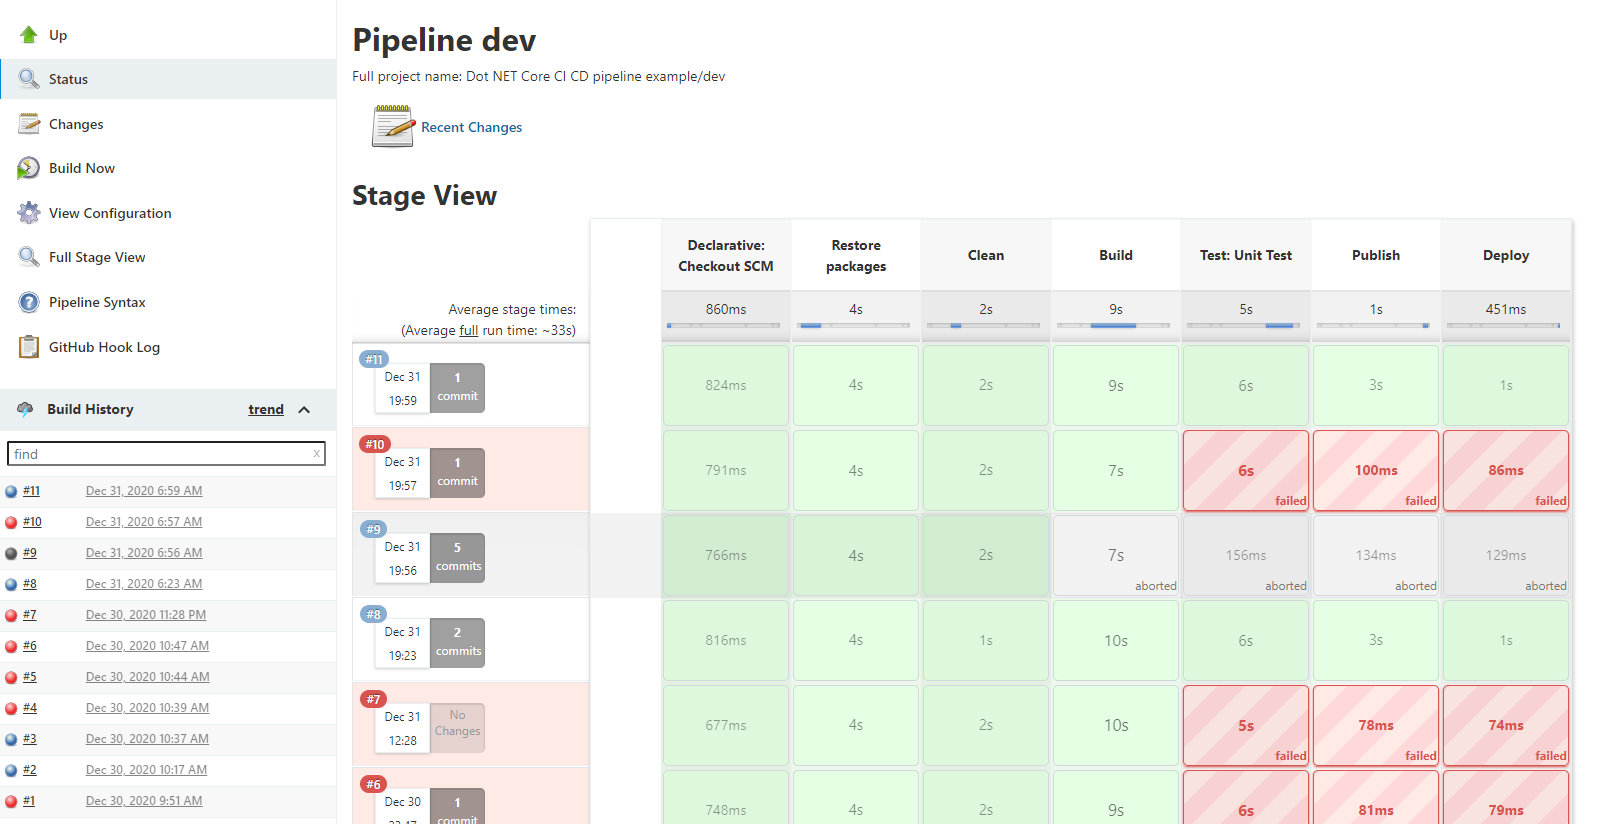
Test
Now, we have everything set up. Push somes codes into repository and take a look at stages.
 Jenkins notify as pipeline code
Now, you have an entire workflow pipeline set up. Let’s enjoy your Jenkins. If you have any questions or doubts, please feel free to leave comments below.